Making linear marks
These are my first two pages where I have drawn lines across the page using various implements and inks.


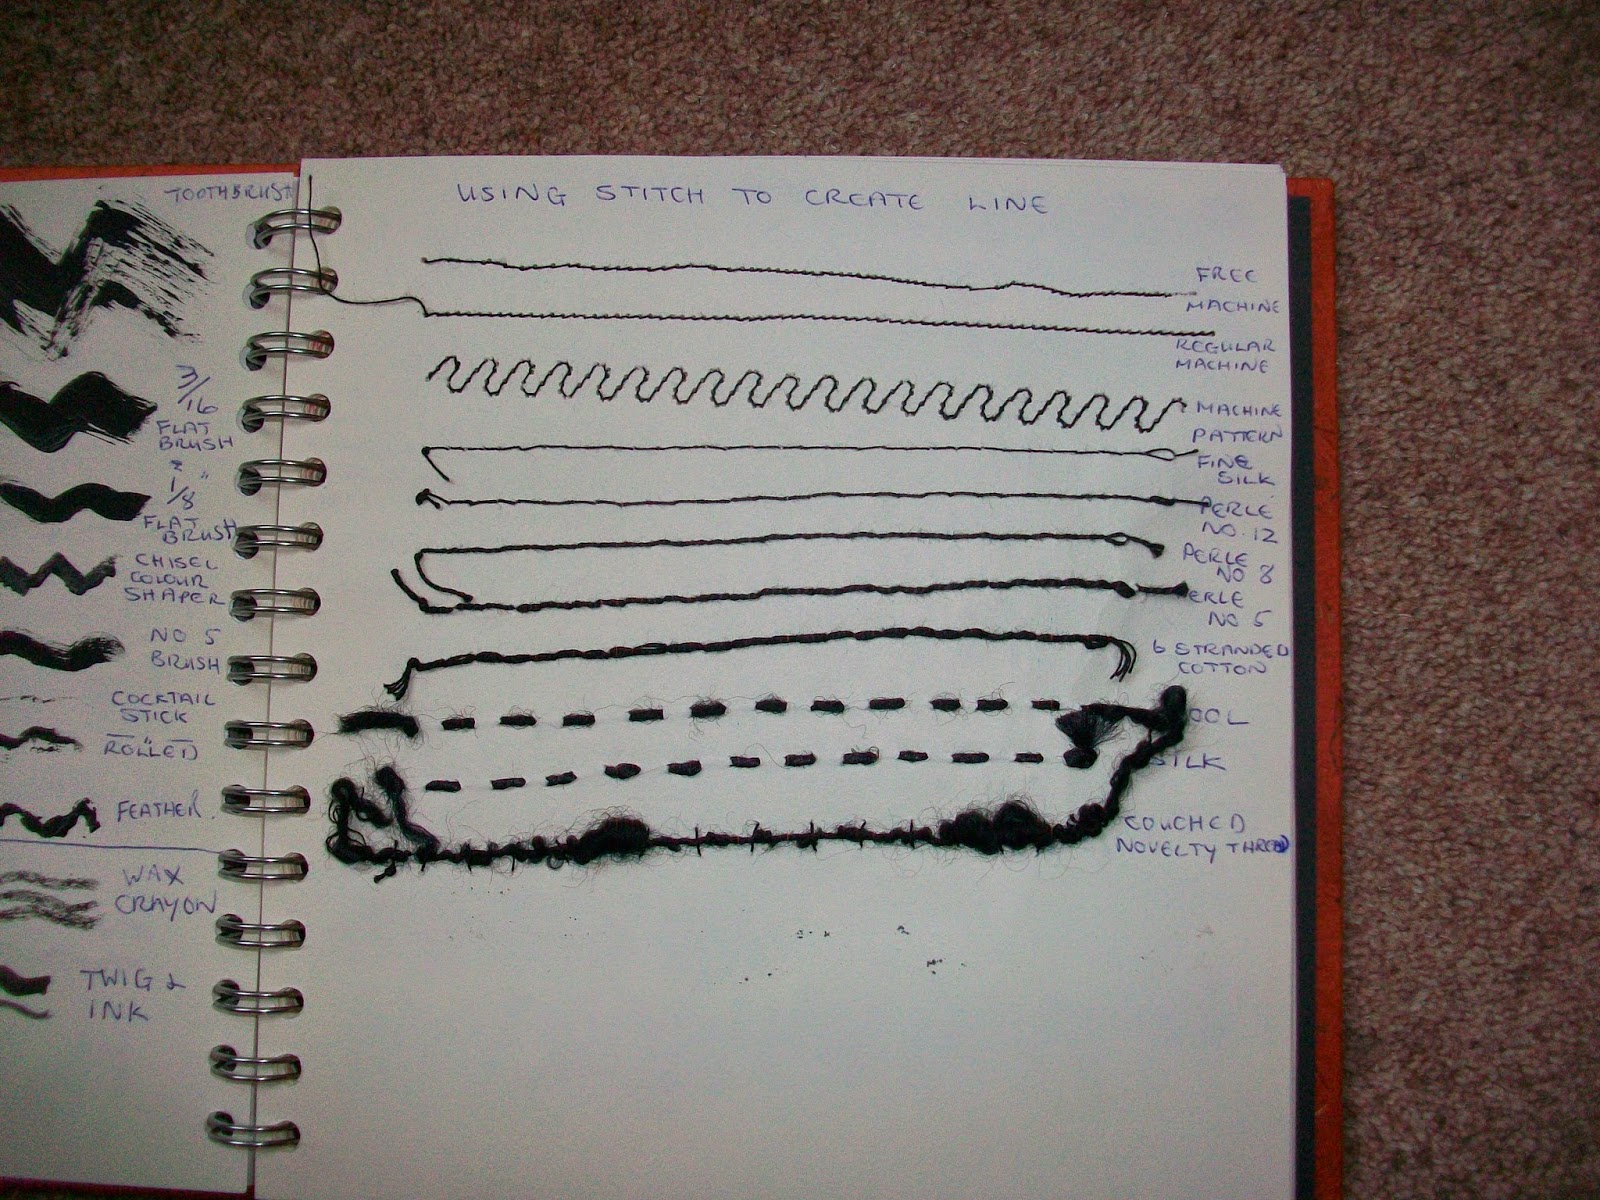
I then decided to try making lines using stitch. The first three rows are on the sewing machine and then I have used hand sewing.
This is the reverse of the page.

I then went on to the varying pressure. I have labelled each page with what I have used.


I particularly like the last two and I am getting used to using charcoal. It is a bit messy but hairspray keeps it in place.
3.1.2
I made a template to make my pages into 4 sections. My sketchbook isn't large (8" x 8") so the squares are fairly small.

This is my first go with the small stones. I had collected them from the garden but they were all very smooth and had no patterns or markings on them. So I realised I would have to make a trip to the beach. I spent about five minutes on each drawing.

These stones were much better. I now have pockets full of sand but quite a nice collection of stones.

This is my first go at drawing them. Again I spent only five minutes drawing each picture. This one got spoilt a bit as the colour came through from the next page.


I couldn't get to a photocopier that enlarged and reduced so I used my Paintshop Pro to do the job. First I cropped the last picture then printed it to fit into an A4 sheet of paper. It doesn't quite fill the page because it is now a square rather than a rectangle.
.jpg)
Here I had resized the image but asked it to fit it all in so it is now squidged together.
.jpg)
This is where I really got clever. I used the layer facility and managed to superimpose the small arrangement on top of the larger one and made the small one transparent. It's not perfect by a long way but I am pleased with the fact that I managed to do it. When I have got more time I will have a play around with colours!
.jpg)
This next one is the second picture traced and placed over the enlarged third picture to create a new one.

Activity 3.1.3
I used my template again for this exercise and some coloured pastels. I have done most of them on a white background but I think a coloured background can intensify the feeling. The first page was anger.

This next one was the back of the above page. I got a bit over zealous with the hair spray and the page was quite wet causing the pastel to soak through. Still made a nice page though.

This page represents peaceful. Soft flowing lines and pale colours. I smudge the pastels to get the effect.

This page represented happiness. Bright bouncy lines and colours.

On the last page I have tried to make the same feelings from black and white marks. The fourth one on this page is confusion. I think the happiness one really doesn't work, it needs the colour. You can't be happy in shades of black.

I might try looking at my enlarged and reduced patterns again and see if I can produce something better.